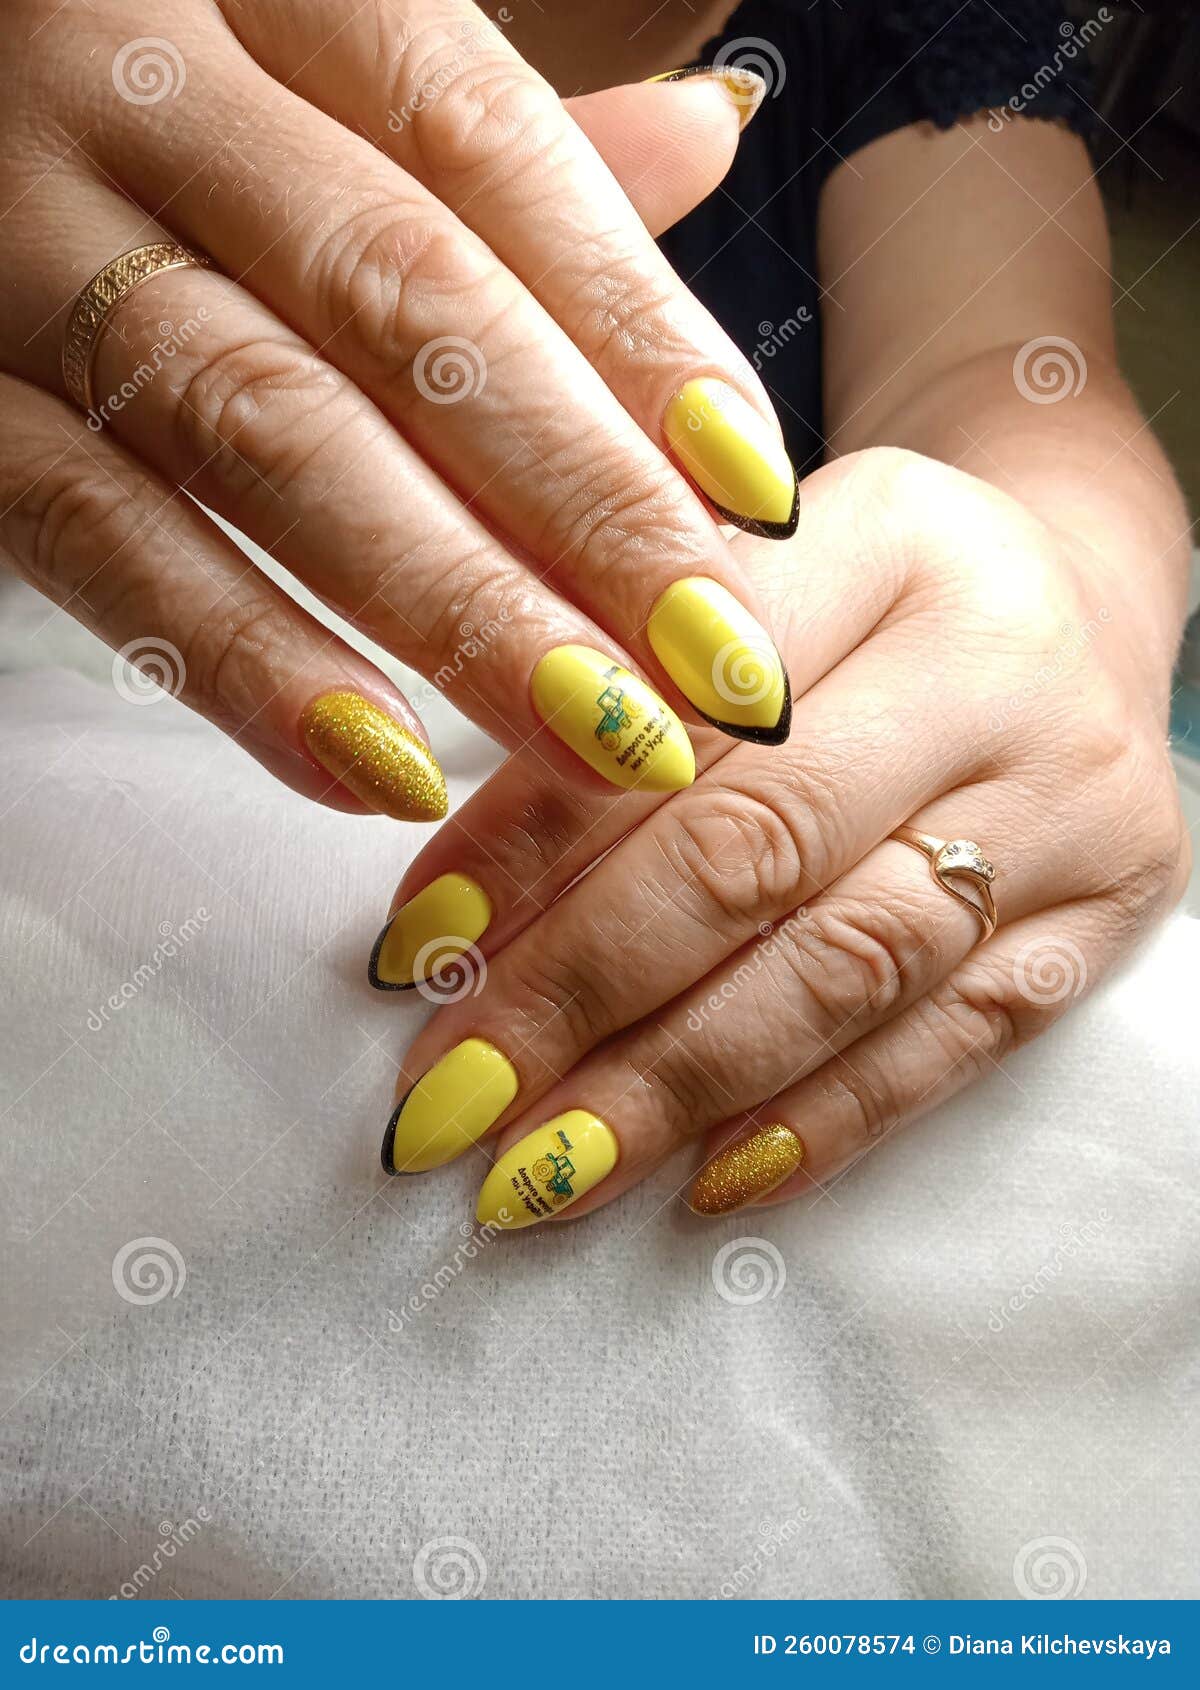
Let’s be real for a second. Yellow gel nail polish is terrifying. Most people look at a bottle of bright, taxi-cab yellow and think, "Absolutely not." It’s loud. It’s temperamental. It has a nasty habit of making your cuticles look red or your hands look washed out if you pick the wrong undertone. But here’s the thing: yellow is actually the secret weapon of high-end editorial manicurists. When you see a set of nails that looks "expensive" but you can’t quite put your finger on why, it’s often because they’ve mastered the art of the primary palette.
Yellow isn't just a color. It’s a statement of technical skill.
If you’ve ever tried to DIY a yellow manicure at home, you know the struggle. It’s streaky. It’s patchy. You apply three coats and you can still see the white of your nail through the pigment. That’s because yellow pigment is physically larger and more "transparent" in the chemical world of nail lacquer compared to something like a dense navy or a rich red. This is why yellow gel nail polish is the gold standard—the curing process under a UV/LED lamp locks those difficult pigments in place before they have a chance to pool or pull away from the edges.
The Science of Why Your Yellow Gel Looks Streaky
It isn't just you. It’s chemistry. In the world of cosmetic formulation, yellow pigments—often derived from iron oxides or arylide yellows—are notorious for being "low hide" pigments. This means they don't cover the surface easily. When a brand like OPI or CND develops a yellow gel nail polish, they have to balance the pigment load with the photo-initiators that make the gel cure.
If they put in too much pigment to make it opaque, the UV light can’t penetrate the layer. The result? "Shrinkage" or "wrinkling," where the top of the gel cures but the bottom stays goopy. It’s a mess.
This is why you should never, ever apply yellow gel in thick layers. You have to go thin. Scarily thin. Your first coat will look like a disaster. It will look like you’ve wiped a highlighter across your nails. But that’s the secret. Two or three paper-thin layers will always outperform one thick, bubbly layer. High-end brands like Bio Seaweed Gel or Aprés Nail have spent millions of dollars trying to solve this "streakiness" issue, but even the best formulas require a steady hand and a bit of patience.
Undertones: The Difference Between "Chic" and "Sick"
Choosing the right yellow gel nail polish is basically a lesson in color theory. You can’t just grab the first bottle you see.
If you have cool undertones (think veins that look blue or purple), a pale, lemony yellow or a neon with a "green" base is going to make your skin look incredible. It pops. If you have warm undertones (veins that look green), you want to lean into the "goldenrod" or mustard territory. These have a bit of red or orange in them which complements the warmth in your skin rather than fighting it.
Then there is the "Butter Yellow" trend. This is the neutral of the yellow world. It’s soft, creamy, and has just enough white in the base to make it opaque in two coats. It’s the "Clean Girl" aesthetic's version of a bold color. It’s subtle enough for the office but interesting enough to prove you aren’t just wearing another "Funny Bunny" or "Bubble Bath" nude.
Why Professional Techs Use Yellow as a Base
You might think yellow is just for a full-color set, but it’s actually the backbone of some of the most complex nail art. Ever wonder how people get those vibrant, glowing orange or lime green gradients? They usually start with a thin layer of yellow gel nail polish.
Because yellow is a primary color, it acts as a "brightener" for anything layered on top of it. If you put a translucent neon orange over a white base, it looks bright. If you put it over a yellow base, it looks like it’s plugged into a light socket. It creates a depth that white just can't mimic.
- Marbling: Dropping a dot of yellow gel into a wet "blooming gel" creates a sun-drenched effect that mimics natural stone better than almost any other shade.
- French Tips: A micro-french in lemon yellow is currently one of the most requested "minimalist" looks in salons from London to New York.
- Negative Space: Using yellow in geometric shapes allows the natural nail to look healthier and brighter by contrast.
The Light Sensitivity Issue
Here is something most people—and even some beginner techs—don't know: yellow gel nail polish is incredibly sensitive to light even after it’s in the bottle. Have you ever noticed your yellow gel turning a weird, muddy brown or orange inside the neck of the bottle?
This is called "curing in the bottle." Because yellow allows more light transmission than darker colors, even ambient sunlight can start the polymerization process if the bottle isn't perfectly opaque. Always store your yellow gels in a cool, dark drawer. Never work near a window where the sun is hitting your brush. I’ve seen $25 bottles of premium Japanese gel ruined in twenty minutes because they were sitting in a sunbeam on a manicure table.
Common Myths About the "Mellow Yellow" Look
"Yellow makes your nails look stained."
Honestly, I hear this one the most. People think that if they wear yellow gel, their natural nails will look like they have a fungal infection once the polish comes off. That’s just flat-out wrong—provided you use a high-quality base coat. Staining happens when the pigment migrates into the porous keratin of your nail plate. A gel base coat creates a non-porous barrier. If you're seeing staining, it’s because you used a cheap, non-gel traditional polish without a base, or you're "soaking off" your gel too aggressively and damaging the nail.
Another myth is that yellow doesn't work for short nails. Some people think bold colors are only for long, "stiletto" or "coffin" shapes. Personally, I think yellow looks better on short, squared-off "active length" nails. It looks intentional. It looks like fashion. On super long nails, a bright yellow can sometimes lean into "costume" territory, but on short nails, it’s just a great accessory.
How to Get a Streak-Free Finish Every Time
If you’re doing this at home, follow this specific workflow. Don't skip steps.
First, you need to buff the nail plate very lightly. Yellow shows every single bump and ridge. If your nail surface isn't smooth, the yellow gel will settle into the "valleys" of your nail and leave the "peaks" looking sheer. A ridge-filling base coat is your best friend here.
Apply your first coat of yellow gel nail polish. Use almost no product on the brush. It should look patchy. It should look like you failed. Cure it for the full 60 seconds (or whatever your specific lamp requires).
The second coat is where the magic happens. Use a slightly more generous amount of product, but keep your brush strokes long and light. Do not press down. You want the gel to "self-level." If you see a streak, wait five seconds before putting your hand in the lamp. Most high-quality gels are designed to flatten out on their own if you give them a moment.
Finally, the top coat. Yellow can sometimes "yellow" even more (ironic, I know) or turn blueish under certain UV-protective top coats. Use a "No-Wipe" top coat that specifically mentions it is non-yellowing. This keeps the color crisp and prevents it from picking up stains from your denim jeans or hair dye.
The Trend Evolution: From Neon to "Butter"
We've moved through several eras of yellow. In the 2010s, it was all about the "high-vis" neon yellow. It was aggressive. It was the era of the festival manicure.
Then we transitioned into the "mustard" craze of the late 2010s, fueled by the 70s revival in interior design. Brands like Terra Vibe or Olive & June (in their long-wear line) leaned heavily into these earthy, "ugly-pretty" yellows.
Now, in 2026, we are seeing a shift toward "translucent" or "syrup" yellows. These are jelly-style gel polishes that look like stained glass or hard candy. They are incredibly forgiving because they aren't meant to be fully opaque. A "honey jelly" yellow gel nail polish gives the nail a healthy, warm glow without the high-maintenance application of a solid cream color. It’s sophisticated. It’s a bit more "editorial."
Real-World Wearability: What to Expect
Yellow is a high-maintenance color. It shows dirt more than a dark navy or a glitter polish. If you work with your hands, or if you're a gardener, or if you cook with turmeric—watch out. Yellow gel can pick up external pigments.
If your yellow gel starts to look a bit dingy after a week, don't panic. You don't have to remove it. Take a cotton ball with a little bit of 90% isopropyl alcohol and give the surface a quick wipe. Usually, it’s just surface oils and grime. If that doesn't work, you can lightly buff the top coat and apply a fresh layer of top coat to "refresh" the color.
Actionable Tips for Your Next Manicure
- Check the pigment: Before buying, shake the bottle. If you hear a mixing ball that sounds "stuck," the pigment has settled. That’s a sign of a high-pigment (and potentially streaky) formula.
- The "Flash Cure" Trick: If you find the gel is shrinking away from your cuticles, "flash cure" each finger for 5-10 seconds immediately after painting it. This freezes the gel in place so it can't move while you finish the rest of your hand.
- Mix your own: If a yellow is too "loud," mix a tiny drop of a white gel into a bit of yellow on a palette. You’ll get a bespoke pastel that is much easier to apply.
- Contrast is key: If you're doing nail art, yellow pairs beautifully with lavender or a deep "Aperol" orange. Avoid pairing it with pure black unless you want to look like a bumblebee or a Pittsburgh Steelers fan—unless that’s the vibe you're going for.
Yellow gel nail polish is the ultimate "gatekeeper" color. It separates the people who just "paint their nails" from the people who understand the technicality of application and the power of a bold, unexpected palette. It’s bright, it’s cheerful, and when done correctly, it’s the most stylish thing in the room. Stop playing it safe with "ballet slippers" and give the sunniest color in the spectrum a fair shot. It’s a lot more versatile than you’ve been led to believe.
To get the best results, start with a "Butter" or "Custard" shade before jumping into the high-intensity neons. This allows you to get used to the application process without the high stakes of a blindingly bright pigment. Focus on those thin layers, invest in a quality LED lamp, and always, always use a dedicated base coat to keep your natural nails pristine. Keep your bottles out of the sun, and you'll find that yellow is less of a headache and more of a highlight.